Aluminum Die Casting Quality Metrics Buyers Should Know
2026-01-29
When looking at aluminum die casting suppliers, it's important to know how to measure quality in order to make good purchasing choices. Modern aluminum die casting methods are very accurate and repeatable, which makes them essential in the aerospace, industrial, and automobile sectors. Quality measures are the basis for judging the skills of suppliers, making sure that parts are reliable, and keeping costs low throughout the entire production process. These measurements include things like surface finish standards, mechanical properties, and defect prevention methods that have a direct effect on how well the final product works.

Understanding Aluminum Die Casting Quality Metrics
Quality measures in aluminum die casting are standards that can be measured and used to judge how well a part works and how consistently it is made. These measures set standards for things like accuracy in measurements, surface finish, structural integrity, and material properties that buyers need to know about before they buy.
Critical Quality Factors and Industry Standards
Die cast aluminum quality is based on its dimensions being exact, which is controlled by well-known standards like ISO 8062 and ASTM A536. These standards set the ranges of tolerances that can be achieved, which are usually within ±0.1mm for most uses. However, for precision uses, requirements as tight as ±0.05mm may be needed. The quality of the surface finish has a direct effect on both how it looks and how well it works. Parameters like Ra (roughness average) and Rz (highest height of roughness profile) can be used to measure this.
Material integrity includes the amount of holes, the number of inclusions, and the uniformity of the microstructure. For structural purposes, porosity readings shouldn't be higher than 2% by volume. For some aerospace parts, the limits may need to be even stricter. These standards make sure that cast aluminum parts keep their mechanical qualities for as long as they are used.
Common Defects and Testing Methods
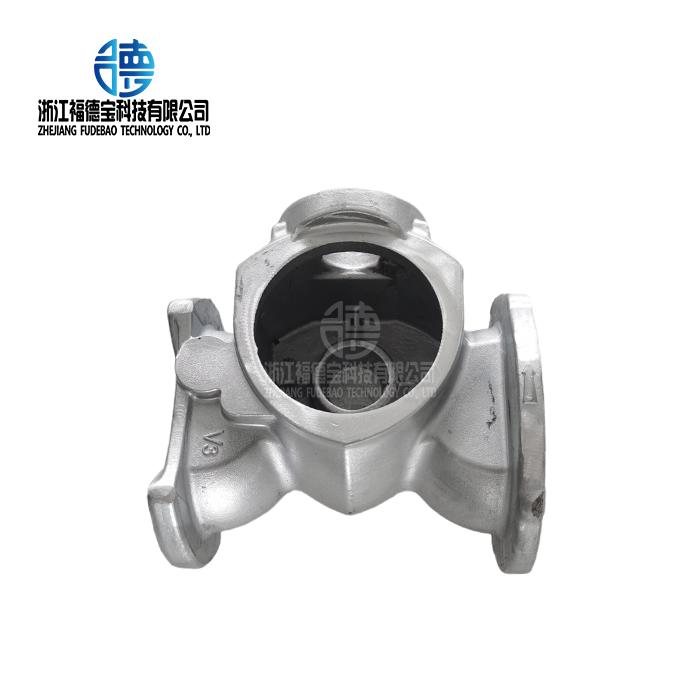
Porosity, cold shuts, flash, and dimensional differences are common flaws in die-cast aluminum that can make parts less useful. Porosity happens when gas gets stuck during the casting process. This leaves holes inside the structure that make it less strong. When two metal fronts meet without properly joining, weak spots are created that can fail. This is called a cold shut.
Non-destructive testing methods give a full picture of quality without hurting any parts. Ultrasonic testing finds defects below the surface and changes in the material's density, while X-ray inspection shows internal porosity and the spread of inclusions. Coordinate measuring tools (CMM) check the accuracy of measurements to levels of precision that can handle the toughest tasks.
Statistical Process Control (SPC) lets you check quality in real time by keeping track of important factors as they are made. This method finds trends before they become quality problems. It keeps the quality of the output steady while lowering the costs of waste and rework.
Core Quality Metrics Buyers Must Evaluate
To successfully procure, you need to have a deep knowledge of the quality factors that set top aluminum die casting suppliers apart from average ones. These measures have a direct relationship with how well a component works, how long it lasts, and how cost-effective it is to make.
Dimensional Tolerance Requirements
The limits for dimensions in aluminum die casting are much tighter than those in sand casting or investment casting. For most dimensions, standard tolerances are between ±0.08mm and ±0.13mm. For important features, precision can reach ±0.05mm if the right process controls are used.
The ability to hold linear tolerances depends on the size of the part. Usually, smaller parts can hold tighter tolerances. For best performance, changes in wall thickness should stay within ±0.08mm, and draft angles between 0.5° and 2° help parts come out correctly without damaging the surface. A lot of the time, flatness standards say that surfaces must be within 0.1 mm per 100 mm of length.
Mechanical Properties Assessment
Different types of aluminum alloys have very different mechanical properties. Some popular die casting alloys are A380, A383, and A413. Its tensile strength is between 310 MPa and 331 MPa, and its yield strength is usually between 159 MPa and 179 MPa. Using the Brinell scale, hardness values range from 80 HB to 100 HB, based on the type of alloy and how it is processed.
The elongation percentage shows how flexible a material is. For standard die casting alloys, the number should be between 2.5% and 3.5%. These features have a direct effect on how long a part lasts when it is loaded and unloaded many times, which is common in industry and automotive settings.
Surface Finish Standards
The quality of the surface finish affects both how well it works and how it looks. When measuring roughness with Ra values, surfaces that are as-cast usually have values between 1.6 and 6.3 μm, while surfaces that have been cut can get values below 0.8 μm. For the best bonding, surface treatments like anodizing, powder coating, and plating need certain levels of roughness.
Different industries have different acceptable defect rates. For example, in the automotive business, yield rates must usually be higher than 99.5%. Even higher standards are needed for aerospace uses, which often need 99.9% yield rates and full traceability documentation for every part.
How to Assess and Choose Reliable Aluminum Die Casting Suppliers?
To choose a supplier, you need to carefully look at their quality processes, performance history, and ability to follow certification requirements. Buyers can find partners who can meet their strict quality standards while also keeping prices low and meeting delivery dates by using effective assessment strategies.
Certification and Quality System Evaluation
Quality certifications are basic signs of how capable and dedicated a company is to consistently delivering high-quality goods. The ISO 9001:2015 certification shows that a basic quality management system has been put in place, while the IATF 16949 certification specifically meets the needs of the automotive industry, covering things like advanced product quality planning and statistical process control.
AS9100 certification means that a company is in line with the strict documentation, configuration management, and risk assessment procedures used in the aerospace industry. These certifications need to be audited on a regular basis and involve efforts to keep getting better, which directly improves the quality results for buyers.
Supplier quality control systems should have processes for inspecting incoming materials, keeping an eye on work in progress, and doing a final inspection. During production, traceability systems need to keep track of material lots, processing parameters, and inspection data. Modern suppliers use monitoring tools that give them real-time information on the stability of the process and changes in quality.
Key Performance Indicators Analysis
Rejection rates are a good way to see how well a supplier is doing at quality control. For standard production methods, the best suppliers keep rejection rates below 100 PPM. To support lean production efforts and keep inventory carrying costs as low as possible, on-time delivery performance should always be higher than 98%.
The percentage of repeat business and customer satisfaction show how reliable and trustworthy a supplier could be in the long run. Suppliers that show they are always getting better by lowering lead times, raising quality standards, and offering better technical help are the best candidates for partnerships.
Rates of capacity utilization and patterns of equipment investments show how a supplier plans to grow and commit to technology progress. Suppliers who keep their current equipment in good shape and use Industry 4.0 technologies will be able to meet changing demands for quality and efficiency.
Automotive Sector Case Study
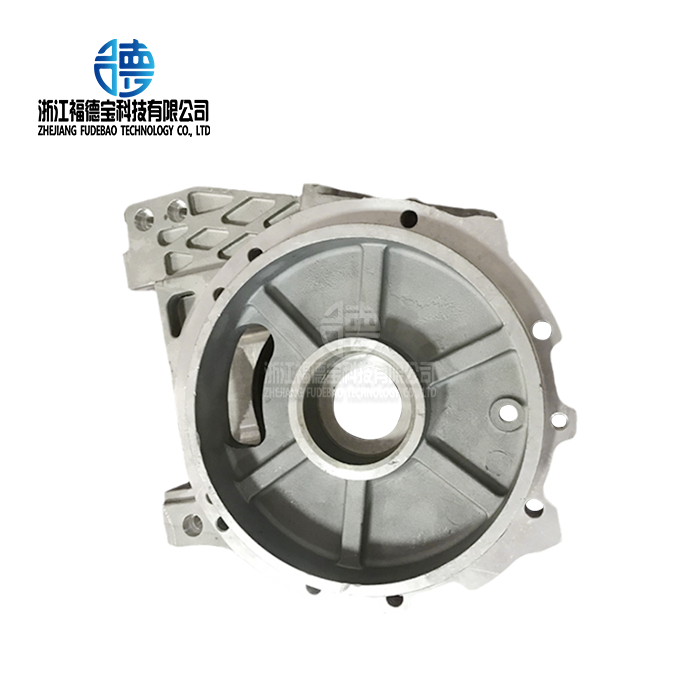
A major tier-1 automotive supplier just started using full supplier quality control for aluminum die casting transmission housings. Over the course of six months, the evaluation process included on-site audits, capability studies, and prototype validation stages.
As part of the quality standards, the dimensions had to be within ±0.05mm, the porosity had to be less than 1%, and there had to be 100% traceability paperwork. The chosen supplier showed that they could adopt SPC, use automated inspection systems, and follow the Production Part Approval Process (PPAP). There were no quality problems during the first year of production thanks to this strict selection process, which proves the effectiveness of the thorough evaluation method.

Best Practices for Ensuring High-Quality Aluminum Die Casting Parts
For quality optimization to happen, buyers and sellers need to work together during the planning, development, and production stages. Using tried-and-true best practices cuts down on quality risks by a large amount while improving component performance and lowering costs.
Design Considerations for Quality Enhancement
Quality problems can be avoided before they happen by carefully optimizing the design. Even wall thickness reduces flaws like holes and shrinkage. The suggested thickness ranges from 2mm to 6mm, depending on the size of the part and its use. To avoid sudden changes in thickness, adjustments should be made slowly over at least three times the ratio.
Draft angles between 1° and 3° help the part release properly while reducing damage to the surface and changes in size. Corner radii should be bigger than 0.5 mm to spread out stress and make it easier for the material to move during casting. Undercuts and complicated shapes need to be carefully looked at to make sure they can be manufactured without lowering the quality.
The shape of the runners and where the gates are placed have a big effect on the filling patterns and solidification properties. The right size of gate stops turbulence and makes sure that the whole space is filled. For big or complicated parts, it may be necessary to use more than one gate to keep the material properties the same all the way through the part.
Advanced Process Controls Implementation
Modern die casting operations use complex tracking and control systems to keep the quality of their output constant. Monitoring temperatures in real time makes sure that metal flows smoothly and solidifies in the right way. Careful control of the injection pressure patterns keeps the dimensions accurate and stops porosity.
The design of the cooling system is very important for quality consistency. If the cooling channels are built correctly, the component will solidify at the same rate all over. Cycle time optimization strikes a balance between the need for efficiency and the need for quality, making sure that there is enough cooling without adding extra time to the production process.
The choice of machine affects the quality of the work that can be done. Newer machines offer better repeatability and process control than older machines. Shot control systems make sure that the metal is delivered precisely, and vacuum systems keep air from getting trapped and the problems that come with it.
Collaborative Improvement Programs
For quality partnerships to work, buyers and sellers must keep working together by talking to each other regularly, doing joint audits, and working together on improvement projects. Early participation of suppliers in the design process stops problems with quality and improves the ease of manufacture and cost-effectiveness.
Joint quality reviews give you a chance to look at performance trends, find ways to make things better, and take corrective steps. Sharing quality measurements and reporting systems makes sure that everyone is on the same page about what is expected of them and how they can improve.
Sharing technology and building skills through programs makes provider relationships stronger and improves quality. Training programs, new equipment purchases, and efforts to improve processes are all good for everyone because they lead to better results and a better place in the market.
About Our Company and Solutions
Precision aluminum die casting is what Zhejiang Fudebao Technology Co. Ltd. does best. They have decades of experience in the field and many quality awards to back this up. We can do all stages of production, from helping with the initial design to delivering finished parts. We use cutting-edge quality control technologies and strict process controls to make sure everything goes smoothly.
We have high-tech machines like high-speed machining centers, CNC lathes, low-pressure casting machines, and precision die casting machines at our plant. These machines cover the whole "melting-casting-finishing-surface treatment" process chain. This unified method allows for one-stop delivery of blank castings to fully finished parts with dimensional accuracy of up to ±0.05mm, meeting the exacting needs of aerospace uses, medical equipment housings, and precision parts for cars.
We work directly with foreign brands, like American HAAS automation machine tools and ESS energy storage systems, to supply the automotive, industrial equipment, machinery manufacturing, and aviation industries around the world. Our quality management system keeps its ISO 9001 and IATF 16949 certifications, which makes sure that the same high quality is delivered across a wide range of industry uses.
Die casting metals A380, A383, and A413 are some of the alloys that can be chosen. Other alloys are available for specific applications. Our full-service testing lab does full material analysis, dimensional verification, and mechanical property validation to make sure products meet customer requirements and industry standards.

Conclusion
Knowing the quality metrics for aluminum die casting helps buyers make smart purchasing choices that improve the performance of parts while minimizing costs. Dimensional accuracy, mechanical properties, surface finish standards, and defect prevention procedures are some of the most important things that are looked at when choosing a supplier. For partnerships to work, they need to be thoroughly checked for things like following certification rules, putting in place quality systems, and making sure that performance records are correct. Collaboration-based growth programs help keep improving quality while also making relationships with suppliers stronger. By using these strategies that focus on quality, buyers can be sure to find aluminum die casting partners who regularly provide precision-engineered parts that meet the highest standards in the industry.
FAQ
What are typical lead times for custom aluminum die casting orders?
Lead times for custom aluminum die casting projects typically range from 4 to 12 weeks depending on part complexity, tooling requirements, and order quantity. Simple components with existing tooling may be completed within 2-4 weeks, while complex parts requiring new tool development can extend to 12-16 weeks. Prototype orders generally require 2-3 weeks for completion, allowing design validation before full production commitment.
How do quality metrics impact aluminum die casting costs?
Quality metrics directly influence costs through several factors including tooling precision requirements, inspection complexity, and yield rates. Tighter dimensional tolerances may increase tooling costs by 15-25% while requiring additional inspection equipment and procedures. Higher quality standards typically reduce downstream costs through improved yield rates, reduced rework, and enhanced component reliability. The optimal approach balances initial quality investment with total cost of ownership throughout the component lifecycle.
Can suppliers accommodate small batch orders for testing purposes?
Most established aluminum die casting suppliers accommodate small batch orders ranging from 50 to 500 pieces for prototype validation and testing purposes. These orders enable design verification, material property validation, and process optimization before committing to large production volumes. Small batch pricing typically includes setup costs distributed across fewer parts, resulting in higher per-piece costs compared to production volumes.
Partner with Fudebao Technology for Superior Aluminum Die Casting Solutions
Elevate your manufacturing success by partnering with Fudebao Technology, your trusted aluminum die casting supplier specializing in precision components for demanding applications. Our comprehensive quality management systems, advanced manufacturing capabilities, and proven track record across automotive, industrial, and aerospace sectors ensure exceptional component performance and reliability. Contact our technical team at hank.shen@fdbcasting.com to discuss your specific requirements and discover how our aluminum die casting expertise can optimize your supply chain performance while maintaining the highest quality standards.
References
Campbell, John. "Complete Casting Handbook: Metal Casting Processes, Metallurgy, Techniques and Design." Oxford: Butterworth-Heinemann, 2015.
Brunhuber, Erwin. "Practice of Diecasting: Aluminum, Magnesium, Copper and Zinc Alloys, Technology, Equipment, Practical Operation." Berlin: Schiele & Schön, 2018.
Vinarcik, Edward J. "High Integrity Die Casting Processes." New York: John Wiley & Sons, 2003.
American Society for Testing and Materials. "ASTM B85 Standard Specification for Aluminum-Alloy Die Castings." West Conshohocken: ASTM International, 2019.
International Organization for Standardization. "ISO 8062-3 Geometrical Product Specifications - Dimensional and Geometrical Tolerances for Moulded Parts." Geneva: ISO Publications, 2007.
Society of Manufacturing Engineers. "Die Casting Handbook: Design, Process Engineering, and Manufacturing Guidelines." Dearborn: SME Publications, 2020.
YOU MAY LIKE


_1756344684491.webp)
_1756346310015.webp)


_1756352561845.webp)
_1756352625880.webp)

